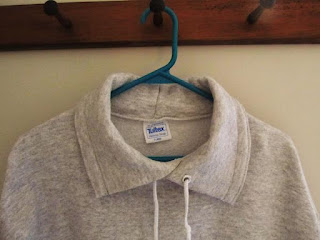
Hiya. This post is about turning your lined hoodie into a collar. Keep in mind, I have no patience so measuring, precise seams, and finesse, are not a concern of mine. These sweats are for working outside and I just wanted to get rid of the bulk on a few.
 There will be three separate posts because of the amount of photos and different style hoods. The first is the easiest of all - the lined hood. Turn the hood down to the shirt and pin along the entire area to see how wide you want the collar. The front throat area is always cut lower than the back so that area will be longer, which is why you can't just use one measurement all the way around.
Start at the back seam and work towards the front edges. You can cut the very top seam of the hood open if it helps. Every shirt is different and should be checked like this, but I didn't since I've done this before. 

I measured the center back of a jacket collar to come up with my width. Pinned the two layers of the hood fabric together (outside and lining) to make sure it didn't shift and turned the shirt inside out. Matching front edges I laid the hood on its side smoothing it out. I measured out from the center back seam, using masking tape as the guide. The tape edge closest to the neck will be where the collar ends, the edge toward the hood's top will be where you sew.
 When running the tape straight, you'll see that the front edge of the hood will have a wider collar measurement since the neck area is cut lower on the shirt. Fold the piece in half and check to see if the tape lines up so you know your front edges will be even. This is real professional, isn't it?
Take a look at the overall line and measure from the shoulder seam to the tape on each side to see if they are even. Close enough? Moving on. Stitch a seam right along the outside edge of the tape, which would be toward the top of the hood, not the body of the shirt. Now you can cut off the hood top from the stitching line and remove the pins.
Here's the only place that has a snag. The back seam of this hood was stitched to the lining and I needed to open that seam in order to pull the two layers apart. I just clipped it open enough for this next step, which is pushing the seam up into the collar.
Try to keep the seam in the center and then pin the edges shut, encasing it completely. Having this fold a little longer on the top side of the collar, and less on the bottom, will make it lay nicer. I didn't care. But I did fold the collar down (like it will be worn) and checked to make sure I didn't have one side of the fold pulled tighter creating an uneven edge. Just make sure they meet as you're sewing. You can leave it as is, or run another line of stitching up from the edge, which makes a little padded detail because of the seam that's stuffed inside.


TA-DA!
 You now have a collared pullover sweatshirt. Another way I've done this was instead of pushing the seam inside, I used quilt binding (or double fold bias tape) to encase the sewn edge and match the fabric appliques I added to


No comments:
Post a Comment